Pages

Subscribe:

Saturday, February 27, 2010

How to Add L4D Custom Content?

How to add custom skins or maps to your Left 4 Dead game?


As promised, this is a guide on how to change the looks of everything in your Left 4 Dead game. This works online and is client-sided, which means only you could get to see the changes and not other players even if you're the host. So enjoy as you change the looks of your survivors, HUD and even the music!


Early Notes
1.
Please backup your files that you will change or overwrite. If you screw up things and couldn't recover, you will have to reinstall and it's tedious!

2. You can get custom content for L4D at FPSBanana (http://www.fpsbanana.com/skins/games/222) or any other sites.


Steam...


How to Install .VPK Files
Now if you downloaded a custom skin or map add-on that is in .VPK format, it is very simple to install. Just place the .VPK file into your addons folder.

Example: ...\Left 4 Dead\left4dead\addons


That's it. Run your game and the add-ons will be loaded. You can then manage your add-ons by going to Extras > Add-Ons.
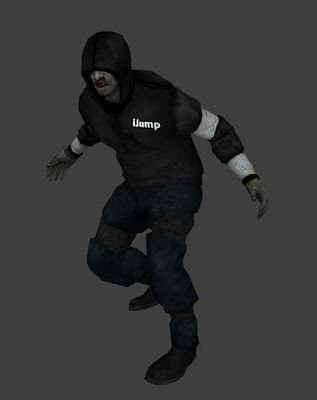


Hunter with cool iJump suit.


How to Install Custom Maps .BSP and .NAV Files
This is also very simple. Just place the .BSP and .NAV files into your maps folder (...\Left 4 Dead\left4dead\maps) and run the game. To load the map, type in "map [your file name]" and enjoy.


Disney's Haunted Mansion in L4D? Thanks to NIPPER and DrBoo's Night Terror Campaign!


How to Install Custom Skins .VTF and .VMT Files
This is the trickiest and most frustrating part of all. If you're a newbie with no clue where to start, you might even give up on installing the skins instead. However, with RailKill's ultimate guide on installing these files, rest assured!


1. Download Notepad++ and Install!
It's very important to have this tool and you can't simply edit your .vpk files with the usual Notepad or Wordpad because it might cause the file to be corrupt.

http://sourceforge.net/project/showfiles.php?group_id=95717&package_id=102072


2. Extract your custom skin content!
Now extract all your custom skin content into your materials folder or anyhow the Readme that came with your download said.


3. Edit whitelist.cfg!
Edit whitelist.cfg which is located in your left4dead folder with Wordpad or anything you like. Look for this line...

// Additional files/directories to allow


Directly underneath it, create a new line and put in...

"add" "materials/models/..."

Remember to make it the same like the other "add" lines by adding indents using Tab button. Save it and close.


4. Edit pak01_dir.vpk with Notepad++!
Go to your left4dead folder and look for pak01_dir.vpk. Right-click it and click Edit with Notepad++. Look for the filenames that your custom content requires to change.

For example, I have a Zoey skin. To change Zoey's clothing, I need to look for zoey_color. You probably will see the same name in your .VMT file. So look for it. If your .VTF file is named zoey_color2, look for zoey_color. Best thing is to read what your custom content's Readme so you don't make mistakes.

Press Crtl + F. Type in zoey_color to search and you should find something like this.


$baseTexture "models\survivors\TeenAngst/zoey_color"


There are two of these exact same lines. You only need to edit the first one UNLESS it is a WEAPON or ITEM skin. Change the zoey_color to the same name as your .VTF file, which in this case is zoey_color2. After changing, it should look like this.


$baseTexture "models\survivors\TeenAngst/zoey_color2"


Do the same for the head and hair if you have. It is the same thing for weapon skins and other skins as well, just refer to your .VTF and .VMT filenames and the Readme! Look for the line with $baseTexture in it, and change the end names.
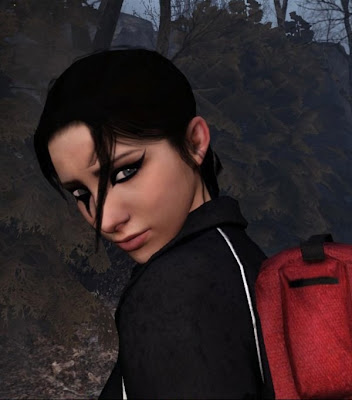


Faith-inspired Zoey. Faith from Mirror's Edge.


Okay, I did the correct thing. But my L4D crashed!
Before I continue, please make sure you really did these steps.

1. Make sure they're in the correct file directory!
Skins are always in the MATERIALS folder (...Left 4 Dead\left4dead\materials) which is then followed by the MODELS folder. Then followed by INFECTED or SURVIVORS or V_MODELS or any folder depending on your custom skin.


2. Only edit the first $baseTexture line!
Do not edit the 2nd one. There are two identical lines, but only edit the first one you encounter.


3. Filename matches the .VTF filename.
In the first $baseTexture line, ensure the name of your file is correct. If your .VTF filename says zoey_color2, make sure it's zoey_color2 in the line as well. Do not change anything on the second $baseTexture line!
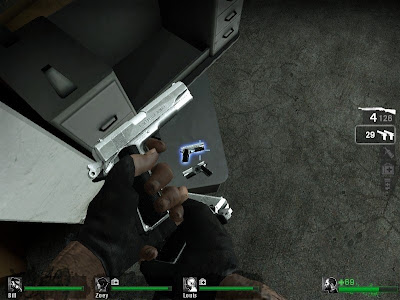


Who would use these pistols if it weren't this beautiful?


Now that you've made sure you've done everything correctly. There is one flaw about it that you might encounter most probably in weapon skins instead. As you add skins, you'll realize that your new skins probably have a different filename and the only difference is that they add a number at the back of the filename.

Example:
Original Filename - v_sniper_reference
Custom Skin Filename - v_sniper_reference2

The difference in the number of characters will also affect and cause your game to crash. Therefore, instead of adding a number behind, we'll just change a letter in that name instead. To do this, we need to download VTFEdit.

http://nemesis.thewavelength.net/index.php?c=178

Install VTFEdit and open the .VMT file of your custom content. We'll edit the hunting rifle skin for this example. In this case the .VMT file is named v_sniper_reference.vmt. Look for the $baseTexture line...


$baseTexture "models\v_models\Weapons\Sniper\V_Sniper_reference2"


Change V_sniper_reference2 to for example, V_Sniper_deference. It will now look like this.


$baseTexture "models\v_models\Weapons\Sniper\V_Sniper_deference"


Save it and close. Then change your .VTF filename to be the same which will also be V_Sniper_deference. Make sure the $baseTexture line in your pak01_dir.vpk is also V_sniper_deference. Save everything, close and run your game. Volia! No crash!


Happy modding and customizing! Next, I will post a tutorial on how to create your own custom music and sounds for L4D!


Love,
Nicholas.

Friday, February 26, 2010

Весна! Прийди!

С середины декабря полноценно с Машкой гуляли всего три раза.
Остальные выходы на улицу: бегом до такси, до бабушки или три проката с горки и бегом домой. Вот такая в этом году зима.
Я помню была в шоке, когда знакомая из Норильска рассказала, что они зимой вообще гулять не ходят. Сказка стала былью.
Даже Машка моя, когда в куклы играет, сначала спрашивает "как дела?" а потом "как машина?", ибо "твоя сегодня завелась?" дежурный второй вопрос.
Решила ловить весну на живца.
Не подействует - сплету кольчугу из ривали :)

Бабочка поближе


Бисер Тохо, Ривали Сваровски, винтажная стрекоза (подданная Америки)

Весна, не вводи в разор - приходи!
(разговор с временем года прошу списать на временное умопомрачение)... надеюсь, что временное :)

Winner Of Challenge 4,,, Lots of Spots

We have a winner of challenge 4, Lots Of Spots
Mr Random.org picked Number 98 Rosie Crafts.

Congratulations Rosie, please email us so we can pass on your details.
Sue.x

Totally Papercrafts Challenge :-) Sue's First Sketch :-)

Challenge # 5 = Sketchy Time.

Good Morning All,


Tis me here this week, (Sue)
Wow we had a great response to last weeks spots challenge, it is lovely to see all your lovely creations. This week I have made a sketch for you,my FIRST one so I hope you like it !!! :-) We look forward to seeing your take on it.

Pop back later to see who the lucky winner is from the Lots of Spots Challenge, they can pick 5 digi images from Sew Many Cards :-)

This week's Sponsor is the lovely Heidi from SimonSaysStamps

Photobucket

we have this gorgeous stamp up for grabs, luv these Happy hoppers.


Here is the sketch :-)


,,,,and here is a bit of inspiration for you from the girls.


We look forward to seeing your entries :-) Please remember to be in with a chance to win the prize you cannot combine more than 5 challenges :-)

Wednesday, February 24, 2010

How to Mod L4D Server?

Find out how to mod your Left 4 Dead server and install custom plug-ins.


This is not a guide to show you how to add your custom skins, sounds and maps. This guide shows you how to mod your Left 4 Dead server with Sourcemod and allows you to add infected bots, change the number of players, make your game have perks and item system, have admin rights, change most of your gameplay and so on!


Steps
1.
Get Sourcemod!
Go to the following link to download the latest Sourcemod version. Extract it to your left4dead folder. (...\Left 4 Dead\left4dead\addons)

http://www.sourcemod.net/downloads.php


2. Get Metamod!
Go to the following link to download the latest Metamod version. Extract it to your left4dead folder. (...\Left 4 Dead\left4dead\addons)

http://www.sourcemm.net/downloads/mmsource-1.8.0.zip

You will also need to make a Metamod VDF file! To do this, go to the following link and choose your Operating System. Choose Left 4 Dead and under Game Folder, leave it blank.

http://www.sourcemm.net/vdf

After you got your VDF file, put it in your Left 4 Dead addons folder. (...\Left 4 Dead\left4dead\addons)


3. Get plugins!
Now that you already have both Sourcemod and Metamod, you are ready to add your own plugins and start the real modding. Go to the following link to browse a list of L4D plugins. Download the .SMX file and place it in your Sourcemod Plugins folder. (...\Left 4 Dead\left4dead\addons\sourcemod\plugins)

http://www.sourcemod.net/plugins.php?cat=0&mod=6&title=&author=&description=&search=1

After you add the .SMX file, you may start your game. The plugin will run and it will be in your game. Certain plugins will create a .CFG file which can be opened with Wordpad or Notepad in your Left 4 Dead cfg folder. (...\Left 4 Dead\left4dead\cfg\sourcemod) You may edit these to configure the plugin's configuration on your server.


For those looking for timed messages or welcome message plugins, I know you couldn't find it in the link provided above. Look for Advertisements or Simple Welcome Message plugins in the Alliance Modders forums! It's not only for L4D but also for other games so don't only look for L4D-only plugins. You can also find the plugins you like here, so do some real browsing in the forums instead! (http://forums.alliedmods.net/forumdisplay.php?f=123)


Damage Info Display Plugin Menu


How to Setup Admin Rights?
You need to be an admin in your server to take control most of the server functions. To do that, you need to change the admins.cfg file. (...\Left 4 Dead\left4dead\addons\sourcemod\configs\admins.cfg)

Open it and read what's written in there. After you understand, or even if you don't understand English...scroll to the bottom and you will find Admins. Add a new admin by typing into the space below based on the example. Here is my example, you can even copy and paste it.


Admins
{
"RailKill"
{
"auth" "name"
"identity" "RailKill"
"flags" "abcdef"
"immunity" "99"
"password" "iloveshit"
}

}


This is the NAME authorization method, which means your name is reserved in the server as an admin and requires a password to actually use the name. Now, how do you type the password in-game?


How To Set Password for Admin Name Authorization
Go to core.cfg which is in the same folder, (...\Left 4 Dead\left4dead\addons\sourcemod\configs\core.cfg) and find for PassInfoVar. In the same line after a couple of spaces, you should find "_PassInfoVar". Change this into anything you like, but I'll give an example and it works so you could follow.


"PassInfoVar" "_adminpass"


Remember to save it. Then, go into your game and open up the console. Type in the following.


setinfo _adminpass iloveshit


Then you can create or join your server and you'll notice you're an admin! To test whether you're an admin, type in !sm_admin on Chat and a menu should open up at the left side. That is the admin menu.


That's about all to create a modded L4D server, but I'll add a bonus section on how to make many players for L4D for those who don't give a shit about reading words or trial and error.


Pounce Announce Plugin


How to Setup Many Player Versus / Co-Op / Survival / 5V5 Versus
Download Left 4 Downtown extension from the following link and extract it in your addons folder as usual. (...\Left 4 Dead\left4dead\addons)

http://forums.alliedmods.net/showthread.php?t=91132

Then download the Slot Management Plugin and put it in your plugins folder. (...\Left 4 Dead\left4dead\addons\sourcemod\plugins)

http://forums.alliedmods.net/showpost.php?p=829638&postcount=71

Also, download the following bunch of CFG files with pre-made commands to ease your server creation. Place all the .CFG files into the CFG folder. (...\Left 4 Dead\left4dead\cfg\sourcemod)

https://forums.alliedmods.net/attachment.php?attachmentid=42348&d=1242676777


Now that you're all done, create your server. Then type in the following.


sm_execcfg sourcemod/5v5versus.cfg


The server will restart and change its map to Dead Air and you will notice there are 5 survivors. Congratulations! You've just made your 5V5 Versus server. To customize the amount of players, you can make your own CFGs as well and just execute them in-game.


ALTERNATIVELY
You can also download the L4D Super Versus plugin or similar plugins that also do the same thing. They're probably easier and you just have to modify the CFG that the plugin uses.


Player Stats Plugin Menu


That's all! Have fun modding your server as you like. Other players do not need to have Sourcemod or any of this to play in your server. You can even take it to a cyber cafe. I'll be off to KL for now. Will be posting how to add custom skins and maps for L4D when I'm back.

Melhoras


Para pegar a imagem "Copie o Código"acima e cole na caixa de mensagens de seus amigos!


Para pegar a imagem "Copie o Código"acima e cole na caixa de mensagens de seus amigos!


Para pegar a imagem "Copie o Código"acima e cole na caixa de mensagens de seus amigos!


Para pegar a imagem "Copie o Código"acima e cole na caixa de mensagens de seus amigos!


Para pegar a imagem "Copie o Código"acima e cole na caixa de mensagens de seus amigos!


Para pegar a imagem "Copie o Código"acima e cole na caixa de mensagens de seus amigos!
Back again after a nice weekend away.  Although the weather could have been better it was still very enjoyable.
A couple of cards made today the first is for my great niece.  The image taken from the
Joanna Sheen CD Rom Precious Petals - they are all such delightful images on there.

And this one is also from a Joanna Sheen CD Rom. Which is the new Jayne Netley Mayhew Collection Part2.
Another stunning set of images it is hard to choose what to use.

Pinewood Derby

Yesterday was pinewood derby day for my youngest son's cub scout pack. My son Kaleb is in the back row all the way to the right (showing his thumbs up sign!) You would have thought that it was the Daytona 500 for all the excitement in the room. Last night was bitter sweet. I realized that it was my last pinewood derby that my boys would be in. My oldest daughter and I were helping get the cars checked in and weighed. We had a can of washers and a hot glue gun to add weight to some of the cars. One boy was questioning why he needed weight, and his dad said, "She has been doing this a long time listen to her." It made me think back to when my son Joshua made his first car. Grandpa helped him shape the car, but it was up to me to help him get it to the right weight. We have a total of 10 pinewood derby cars from my boy's cub scout years. We have had a pick up truck, a big rig, a GTO,... and last night a ghetto car with graffiti. I just hope that the boys will have as good memories about their pinewood derbies as I have.

Tuesday, February 23, 2010

Early Spring from my MOM and DAD

I just got this wonderful suprise at my workplace. My mom and dad sent me these flowers, because they knew I was tired of seeing nothing but white. I have been longing for color. Now I have all this beautiful color to look at.

С праздником!


Что за праздник 23 февраля? Об истории праздника. (щёлкните по этой ссылке)

Dogwood Tutorial

These are the punches that I use to make the dogwood flower.


Out of pale pink paper, punch out 4-petals using the balloon punch.


Out of pale yellow paper, punch out a snowflake.


Use 1/8" circle punch to punch the edges
of the petals and the center of the snowflake.


Out of green paper, punch one flower. This will be the base.


To make the center, I use a quilling tool.


A quilling tool has a notch at the top to hold the paper.
They are not very expensive. I bought mine at the
craft store for less than $5.


Slide the quilling tool into the center of the snowflake.


Slowly wind the snowflake around the quilling tool.


Snowflake will look like this when it is all rolled up.
Slowly slide it up off of the quilling tool.


Here is the center, off of the quilling tool.


Add glue to the flower base.


Add one of the petals to the base.


Add a second petal on opposite side to make it even.


Add third petal.


Add fourth petal and while glue is still wet, scrunch up
the petals to make a bowl.


Add glue to center of flower.


Add quilled, rolled up snowflake to the center.


For this card I added gold glitter to the centers of my dogwood flowers.


Related Posts Plugin for WordPress, Blogger...

Blog Archive