


It has been a long time since I did a tutorial. I thought I would share with you how burned paper bag technique looks. I remember doing burned paper bag technique more than 20 years ago. I used a candle to heat the glue then. Now I use my heat gun and it goes a lot quicker and makes less mess.
 Start with putting a puddle of Aleene's Tacky Glue, onto the paper bag.
I use a scrap piece of cardstock to smear the glue in a thin layer

I take my heat gun and I heat the glue. It will bubble and pop. I heat it until the glue is transparent.

When it cools it looks like this. It is shiny and has texture. It feels a little like leather.

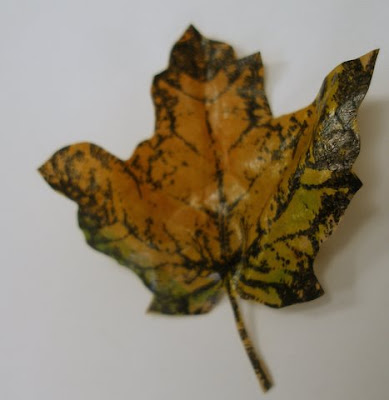
Using black stazon ink, I stamped the leaf over the layer of dried glue. I used the leaf from Mark's Finest Papers set called AUTUMN GLORY.

To add color to my leaves, I took an acetate report folder and I scribbled with "Fall" colored markers onto the folder.
 I dipped my paint brush into water and picked up color from the scribbled markers.
 I then painted over the glue. Since I was going to cut the leaves out, I wasn't very careful about painting in the lines. I just put down the color.
 This is how the leaves look when the leaves are dry.
 I cut the leaves out.
I shaped the cut out leaves by folding the leaf in half lengthwise.

I further shaped the leaf by folding the sides backwards.


Here is the card that I made with these burned paper bag leaves.


.jpg)
.jpg)

.jpg)
.gif)


No comments:
Post a Comment