Pages

Subscribe:
Showing posts with label christmas svg. Show all posts

Wednesday, December 28, 2011

christmas frame


download frame

Saturday, December 17, 2011

Christmas Subway Art

Download the svg
Download the Image for printing

Be Naughty, Sae Santa the trip!


Let it Snow Title


fixed link

                                                              DOWNLOAD LET IT SNOW

Wednesday, December 7, 2011

Simple Card Stock Basket

You have seen many of these baskets online. Usually they come with lots of instructions about cutting squares, then cutting them into triangles, etc. I decided i would make a svg file to cut out the squares and triangles for you.  You use two different papers. 


Because it is difficult to cut a 12x12 paper on the cricut, you still need to make that part by hand. Using your score board, score your 12 by paper every 4 inches, both vertically and horizontally. you will have 9 squares on your paper. Fold on score lines. Then in each corner, score at 45 degrees, then fold.


Glue squares into each square on your paper, front and back. You don't need one in the middle. Glue triangles onto each triangle. Then punch hold in each corner of triangle. Thread ribbon through the holes and tighten, tie in bow. Or use a o ring to close basket by threading through holes. Then tie on small ribbons around ring, between holes. I added embellishments from my paper pack for a cute finished product.

I don't know if I did a good job explaining.Tutorial on how to make box by hand

Picture above from tutorial.


Cardstock Box Trims

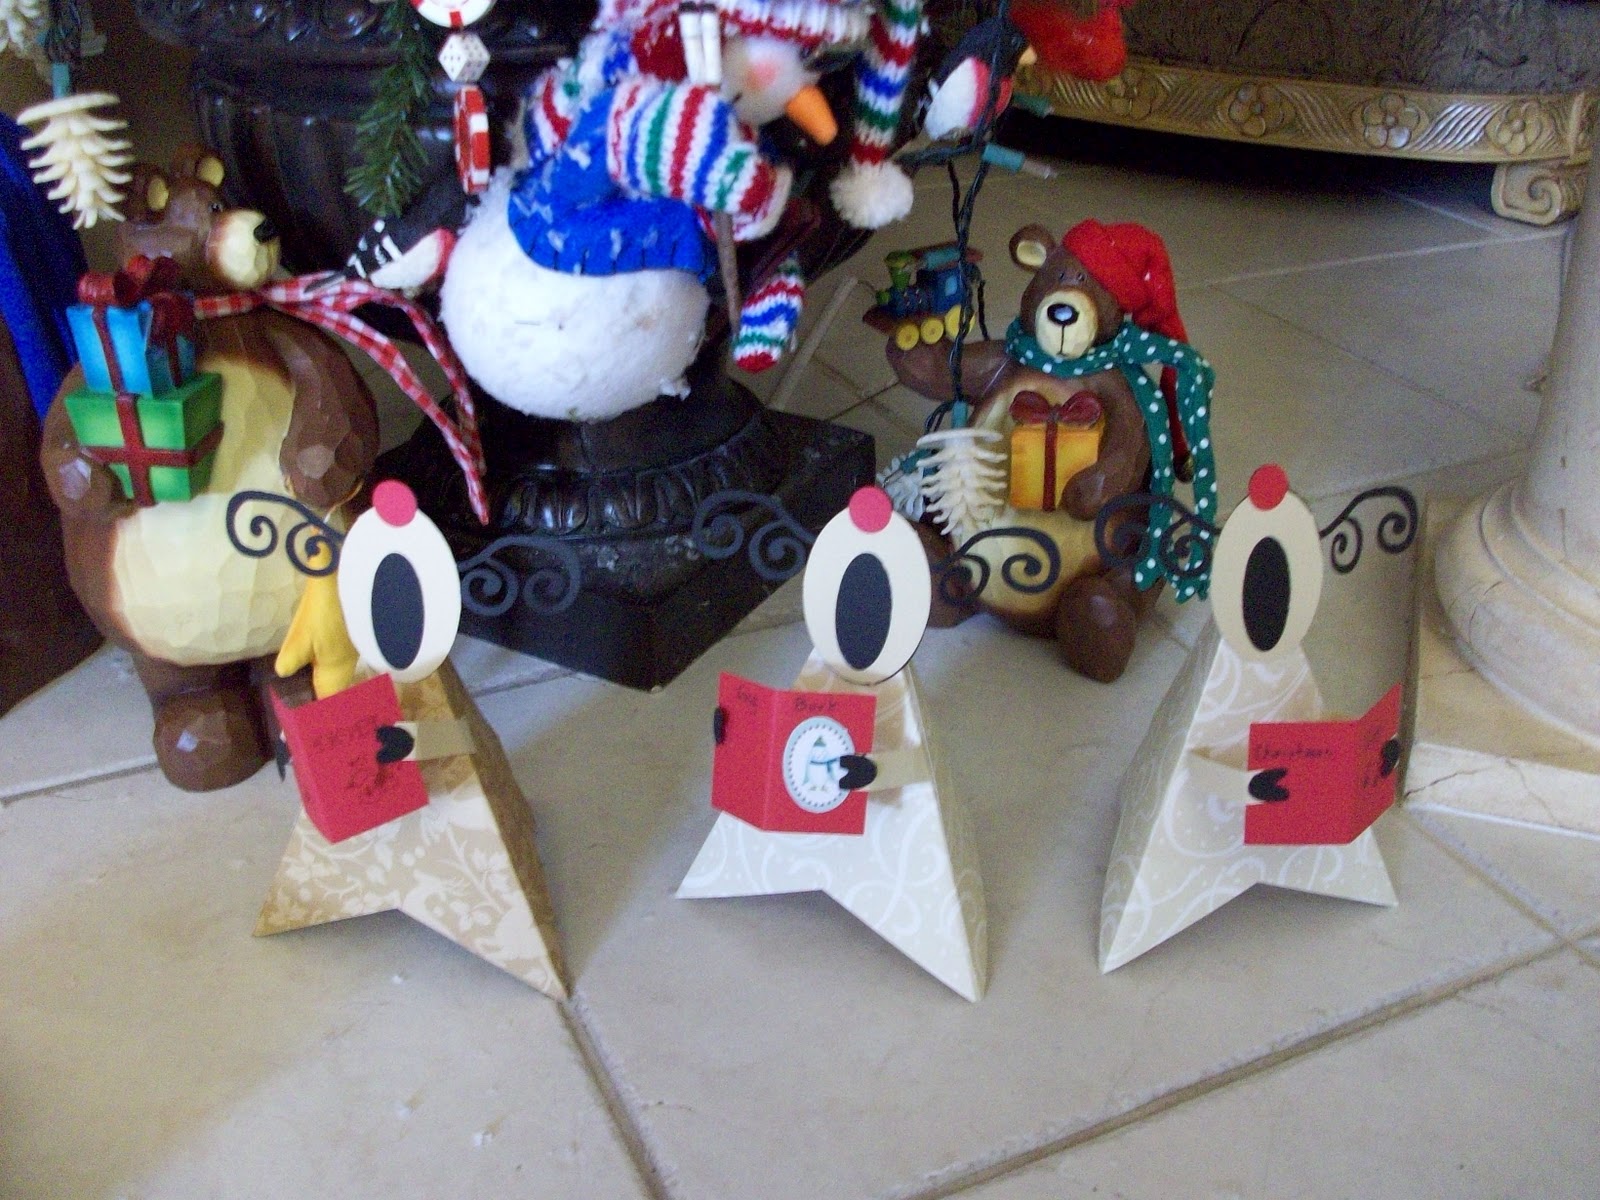
Singing Reindeer Table Decoration...updated


This file had a square in it that wasn't supposed to be there and some of the heads were overlapping. Easy enough to fix in scal, but why should you have to. I just fixed it in inkscape and reposted the file. Please download it again!
Download file to cut heads, arms, book


In addition, for each reindeer, cut 3 6x6 inche squares, and fold diagonally. Overlap and glue together to make a triangle that stands up. Look at photo above.  Add arms, glue on hoof hands, fold rectangle into book shape and attach.Some books I stamped an image on.Others i just used markers and/or stickers. Assemble the head and attach. Easy Peasy...File cuts out four of each item.  To see additional items, move mat 12 inches to the left(-12 for x, then -24).  When you first open it you will just see the heads and antlers. The reindeer heads and arms are on the next "mat". The red accessories on the third mat.

I will find the link for the original idea.

 The singing reindeer heads are from my own singing reindeer post a few days ago. You can make the singing santas and snowmen too, using that file to get you started.

The Simple Joy of a New Toy

Download Joy of Toys

Christmas Morning Memories

Download Memories

Friday, December 2, 2011

Dancing Reindeer and Snowmen...

Last year I gave you dancing santa and reindeer. This year the santa, reindeer and snowmen are caroling.

I fixed the file and color separated it too. If you don't want all the people at once, you will have to delete their pieces. I did it on 3 separate 12x12 mats, all in one file. As I design in inkscape, I haven't figured out the scal layers yet.


NEW COLOR SEPARATED FILE, EASIER TO CUT
Download the file

Monday, December 6, 2010

Singing Santa, Reindeer and Snowmen...FILE FIXED

Last year I gave you dancing santa and reindeer. This year the santa, reindeer and snowmen are caroling. I'M SORRY THIS FILE DIDN'T WORK. I FORGOT TO CONVERT SOME RECTANGLES AND CIRCLES TO PATHS. IT LOOKED FINE IN INKSCAPE.

I fixed the file and color separated it too. If you don't want all the people at once, you will have to delete their peices. I did it on 3 separate 12x12 mats, all in one file. As I design in inkscape, I haven't figured out the scal layers yet.


NEW COLOR SEPARATED FILE, EASIER TO CUT
Download the file

Saturday, November 13, 2010

Friday, November 12, 2010

More Paper Ornaments

These paper ornaments are fun and easy. Use two sided paper for an even nicer design. I only have my iphone for pictures, so these aren't the best. You can see the first ornament is just a circle with a star cut in the middle. I put little dashes to show you where to fold these. Look closely and you will find them. That is only trick, getting them folded the "same" on each side.

 Then put glue on the folded flaps and connect to another folded flap to make a "cube" shape. I put my ribbon hanger in one corner, before I sealed the last flap. If you didn't have the star in the middle, you could put it in the middle of one of the cube sides.  You could do these with solid circles, and add embellishments(see ornament after this one).


The second ornament is assembled the same way. Jus fold in sides leaving a square in the middle. Glue contrasting squares in middle. I used stars cut from ornament above to embellish. Hey..I'm in a hotel room and have limited supplied!  Some beads and glitter would be nice. I'd add them before I glued it all together.


Thursday, November 11, 2010

Christmas Celebrate the Season Circles

download the circles...alll in one file

download merry christmas circles

Included is a blank one so you can add your own message. I used stencillia-a font.

Paper Christmas Ornaments

Yesterday at Tuesday Morning I picked up this book of paper ornaments. It makes 88 ornaments. I figured I could use it to make some svg patterns we could cut.  At 3.99 you might want to just go and buy a copy of your own. You just punch out the ornaments and assemble them. They are quite nice. I plan to use them for the girls at the Pace school where I volunteer. When I cut things on the cricut, I always have a hard time keeping all the little pieces together. This way I can give each of them a page and they can make the 3 ornaments on the page. I will bring some bling and ribbon they can use to enhance their projects.
 Here is one ornament I made from the kit yesterday. It is a rosette, but made in a shape with holes cut in it.

 Here is one I cut in the hotel making my own similar pattern which I will give to you here.
I found it easier to fold the larger folds first(every other fold) so that the circles lined up. Then I  went back and folded each petal with the circle in it, in half. The ones in the kit have fold lines which made it easier to fold. You could cut fold lines but it would take forever. If you have a score board, you could make the score lines.  Use paper, not card stock, or it will be too thick to fold. Once folded, attach the two strips into one. Flatten, curving into a circle, so that the centers of the petals are compressed and touching, while the outer edges fan out. I put a bunch of glue in the middle and quickly put on a center, then held it for a few minutes flat against the table. Maybe someone has a secret for securing these quickly. THe book says to staple it, wasn't sure what IT was and didn't have a stapler.


Pattern for this rosette:

From the book


from my svg

Monday, November 8, 2010

Random Reindeer

You will have to color separate. I left them assembled, but the pieces are here for the eyes, etc. You can tell what color by the color they are on the screen.

Download the reindeer svg

Tuesday, November 2, 2010

Merry Christmas Penguins

 I was testing out a new font, and decided I might as well make another Holiday greeting die cut. Of course, I will share it with you!

Uploade penguins

By the way the font was called Airplanes in the night sky...I think it is a cute one. I outset it once to make it thicker, and still had to move some letters over to make them weld.  It is "almost" a stencil...just a few letters would need to be modified.
Related Posts Plugin for WordPress, Blogger...

Blog Archive