As promised, this is a guide on how to change the looks of everything in your Left 4 Dead game. This works online and is client-sided, which means only you could get to see the changes and not other players even if you're the host. So enjoy as you change the looks of your survivors, HUD and even the music!
Early Notes
1. Please backup your files that you will change or overwrite. If you screw up things and couldn't recover, you will have to reinstall and it's tedious!
2. You can get custom content for L4D at FPSBanana (http://www.fpsbanana.com/skins/games/222) or any other sites.

Steam...
How to Install .VPK Files
Now if you downloaded a custom skin or map add-on that is in .VPK format, it is very simple to install. Just place the .VPK file into your addons folder.
Example: ...\Left 4 Dead\left4dead\addons
That's it. Run your game and the add-ons will be loaded. You can then manage your add-ons by going to Extras > Add-Ons.

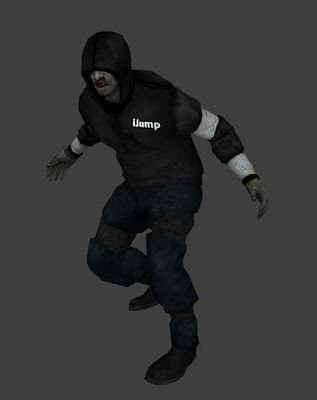
Hunter with cool iJump suit.
How to Install Custom Maps .BSP and .NAV Files
This is also very simple. Just place the .BSP and .NAV files into your maps folder (...\Left 4 Dead\left4dead\maps) and run the game. To load the map, type in "map [your file name]" and enjoy.

Disney's Haunted Mansion in L4D? Thanks to NIPPER and DrBoo's Night Terror Campaign!
How to Install Custom Skins .VTF and .VMT Files
This is the trickiest and most frustrating part of all. If you're a newbie with no clue where to start, you might even give up on installing the skins instead. However, with RailKill's ultimate guide on installing these files, rest assured!
1. Download Notepad++ and Install!
It's very important to have this tool and you can't simply edit your .vpk files with the usual Notepad or Wordpad because it might cause the file to be corrupt.
http://sourceforge.net/project/showfiles.php?group_id=95717&package_id=102072
2. Extract your custom skin content!
Now extract all your custom skin content into your materials folder or anyhow the Readme that came with your download said.
3. Edit whitelist.cfg!
Edit whitelist.cfg which is located in your left4dead folder with Wordpad or anything you like. Look for this line...
// Additional files/directories to allow
Directly underneath it, create a new line and put in...
"add" "materials/models/..."
Remember to make it the same like the other "add" lines by adding indents using Tab button. Save it and close.
4. Edit pak01_dir.vpk with Notepad++!
Go to your left4dead folder and look for pak01_dir.vpk. Right-click it and click Edit with Notepad++. Look for the filenames that your custom content requires to change.
For example, I have a Zoey skin. To change Zoey's clothing, I need to look for zoey_color. You probably will see the same name in your .VMT file. So look for it. If your .VTF file is named zoey_color2, look for zoey_color. Best thing is to read what your custom content's Readme so you don't make mistakes.
Press Crtl + F. Type in zoey_color to search and you should find something like this.
$baseTexture "models\survivors\TeenAngst/zoey_color"
There are two of these exact same lines. You only need to edit the first one UNLESS it is a WEAPON or ITEM skin. Change the zoey_color to the same name as your .VTF file, which in this case is zoey_color2. After changing, it should look like this.
$baseTexture "models\survivors\TeenAngst/zoey_color2"
Do the same for the head and hair if you have. It is the same thing for weapon skins and other skins as well, just refer to your .VTF and .VMT filenames and the Readme! Look for the line with $baseTexture in it, and change the end names.

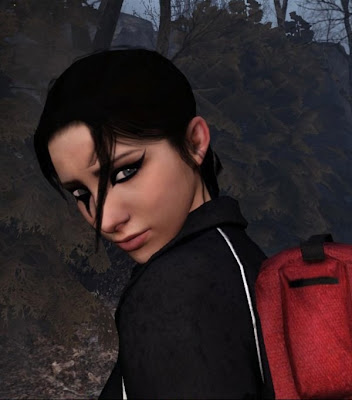
Faith-inspired Zoey. Faith from Mirror's Edge.
Okay, I did the correct thing. But my L4D crashed!
Before I continue, please make sure you really did these steps.
1. Make sure they're in the correct file directory!
Skins are always in the MATERIALS folder (...Left 4 Dead\left4dead\materials) which is then followed by the MODELS folder. Then followed by INFECTED or SURVIVORS or V_MODELS or any folder depending on your custom skin.
2. Only edit the first $baseTexture line!
Do not edit the 2nd one. There are two identical lines, but only edit the first one you encounter.
3. Filename matches the .VTF filename.
In the first $baseTexture line, ensure the name of your file is correct. If your .VTF filename says zoey_color2, make sure it's zoey_color2 in the line as well. Do not change anything on the second $baseTexture line!

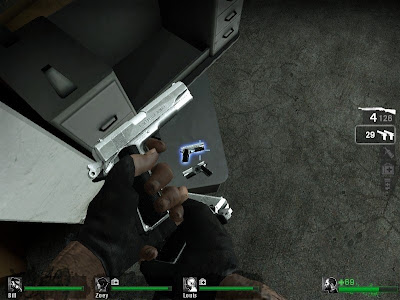
Who would use these pistols if it weren't this beautiful?
Now that you've made sure you've done everything correctly. There is one flaw about it that you might encounter most probably in weapon skins instead. As you add skins, you'll realize that your new skins probably have a different filename and the only difference is that they add a number at the back of the filename.
Example:
Original Filename - v_sniper_reference
Custom Skin Filename - v_sniper_reference2
The difference in the number of characters will also affect and cause your game to crash. Therefore, instead of adding a number behind, we'll just change a letter in that name instead. To do this, we need to download VTFEdit.
http://nemesis.thewavelength.net/index.php?c=178
Install VTFEdit and open the .VMT file of your custom content. We'll edit the hunting rifle skin for this example. In this case the .VMT file is named v_sniper_reference.vmt. Look for the $baseTexture line...
$baseTexture "models\v_models\Weapons\Sniper\V_Sniper_reference2"
Change V_sniper_reference2 to for example, V_Sniper_deference. It will now look like this.
$baseTexture "models\v_models\Weapons\Sniper\V_Sniper_deference"
Save it and close. Then change your .VTF filename to be the same which will also be V_Sniper_deference. Make sure the $baseTexture line in your pak01_dir.vpk is also V_sniper_deference. Save everything, close and run your game. Volia! No crash!
Happy modding and customizing! Next, I will post a tutorial on how to create your own custom music and sounds for L4D!
Love,
Nicholas.


.JPG)


.jpg)
.jpg)

.jpg)
.gif)


